Get Started with Eremex Avalonia UI Controls on ALT Linux
This tutorial walks you through creating an Avalonia UI application with Eremex Controls on ALT Linux. First, we'll set up the environment to develop .NET applications, and then create a project with the EMX DataGrid control.
1. Prerequisites
Ensure the .NET SDK and Visual Studio Code are installed on ALT Linux. The following sections show how to install them from the command line.
1.1 Install .NET SDK
To develop .NET applications on ALT Linux, install the .NET SDK package. For example, to install .NET 8 SDK, run the following command in the terminal:
sudo apt-get install dotnet-sdk-8.0
1.2 Install Visual Studio Code and C# Dev Kit Extension
For instructions on installing VS Code on ALT Linux, refer to: Education applications: VS Code.
Alternatively, you can download the VS Code RPM package from the Download Visual Studio Code page, and then install it with the following command:
sudo apt-get install code_xxx.rpm
(Replace code_xxx.rpm with the actual name of the downloaded package.)
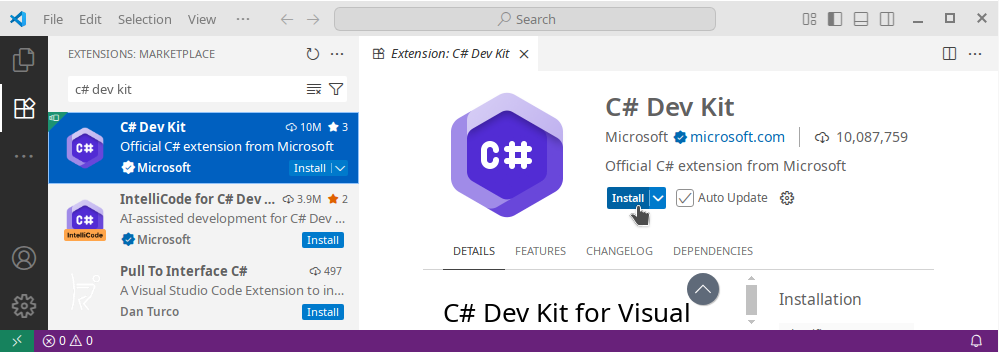
Run VS Code, and install the C# Dev Kit add-on from the Extensions tab.
2. Install Eremex Project Templates
The EMX Controls library includes a collection of project templates that help you create new Avalonia projects with the EMX Controls. Install these templates by running the following command in the terminal:
dotnet new install Eremex.Avalonia.Templates
3. Create a New Project
Navigate to the directory where you want to generate a project. Execute the command below to create an MVVM-aware project named AvaloniaApplication1 according to the eremex.avalonia.mvvm project template.
dotnet new eremex.avalonia.mvvm -n AvaloniaApplication1
If you encounter certificate warnings for nuget.org, you should manually add required root certificates to your OS. To temporarily bypass certificate verification, run the following command:
DOTNET_NUGET_SIGNATURE_VERIFICATION=false dotnet new eremex.avalonia.mvvm -n AvaloniaApplication1
The generated project includes:
- All necessary Eremex Controls package references
- The 'DeltaDesign' paint theme registered in
App.axaml. - MxWindow used as the main application window.
MxWindowis a dedicated window that paints its elements (background, border and title bar) according to the current Eremex paint theme.
4. Open the Project in VS Code
In VS Code, open the generated AvaloniaApplication1 folder.
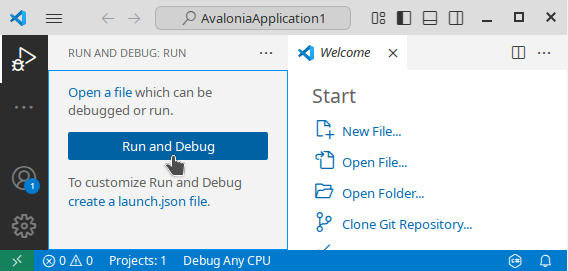
Switch to the Run and Debug tab (Ctrl+Shift+D), and click the Run and Debug button:
Select c# as the debug environment:

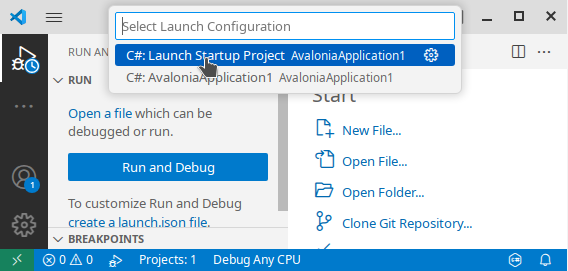
Select C#: Launch Startup Project:
Select AvaloniaApplication1.csproj as the startup project:
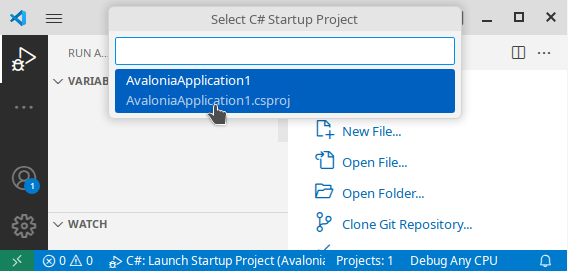
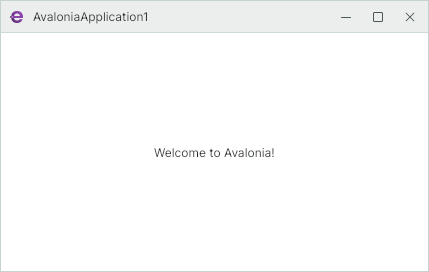
VS Code will then build and run the project.
You can also run the project from the terminal using the following command:
dotnet run
5. Choose the Light or Dark Paint Theme Variant
The Eremex Application Templates automatically add the registration code for the DeltaDesign paint theme to the created project. Open the App.axaml file to locate this code in the Application object definition.
The DeltaDesign paint theme supports the Light and Dark theme variants. Use the Application.RequestedThemeVariant property to specify the required theme variant.
<Application xmlns="https://github.com/avaloniaui"
    xmlns:x="http://schemas.microsoft.com/winfx/2006/xaml"
    x:Class="AvaloniaApplication1.App"
    xmlns:local="using:AvaloniaApplication1"
    xmlns:theme=
    "clr-namespace:Eremex.AvaloniaUI.Themes.DeltaDesign;assembly=Eremex.Avalonia.Themes.DeltaDesign"
    RequestedThemeVariant="Light">
  <!-- "Default" - The application's theme variant is defined by the system setting.
       "Light" - Enables the Light theme variant.
       "Dark" - Enables the Dark theme variant.
  -->
    <!-- .... -->
    <Application.Styles>
        <theme:DeltaDesignTheme/>
        <!-- .... -->
    </Application.Styles>
</Application>
In the sections below, we'll add an Eremex DataGridControl control to a View and bind it to the Employees collection defined in a View Model.
6. Define Data for a Data Grid
Open the Main View Model (MainWindowViewModel.cs) and define the Employees collection to which a Data Grid will be bound.
using CommunityToolkit.Mvvm.ComponentModel;
using System;
using System.Collections.Generic;

namespace AvaloniaApplication1.ViewModels;

public partial class MainWindowViewModel : ViewModelBase
{
    [ObservableProperty]
    IList<EmployeeInfo> employees;

    public MainWindowViewModel()
    {
        Employees = new List<EmployeeInfo>
        {
            new EmployeeInfo("Alex", "Smith", new DateTime(1990, 1, 1)),
            new EmployeeInfo("Samantha", "Brown", new DateTime(1988, 2, 5)),
            new EmployeeInfo("Nick", "Morris", new DateTime(2000, 8, 25)),
            new EmployeeInfo("Julia", "Lee", new DateTime(2005, 12, 3))
        };
    }
}

public partial class EmployeeInfo : ObservableObject
{
    [ObservableProperty]
    public string firstName;
    [ObservableProperty]
    public string lastName;
    [ObservableProperty]
    public DateTime birthDate;
    public EmployeeInfo(string firstName, string lastName, DateTime birthDate)
    {
        FirstName = firstName;
        LastName = lastName;
        BirthDate = birthDate;
    }
}
7. Add Eremex Avalonia Control Namespaces in XAML
Before you define Eremex Avalonia controls in XAML, first declare namespaces that contain these controls. To use DataGridControl in the Main Window, add the following namespace to the MainWindow.axaml file:
<mx:MxWindow
...
xmlns:mxdg="https://schemas.eremexcontrols.net/avalonia/datagrid"
>
See the table below for a list of namespaces for the Eremex controls and helper classes:
| Product/Classes | Namespace |
|---|---|
| Data Grid | xmlns:mxdg="https://schemas.eremexcontrols.net/avalonia/datagrid" |
| Tree List and Tree View | xmlns:mxtl="https://schemas.eremexcontrols.net/avalonia/treelist" |
| Editors and Utility Controls | xmlns:mxe="https://schemas.eremexcontrols.net/avalonia/editors" |
| Charts | xmlns:mxc="https://schemas.eremexcontrols.net/avalonia/charts" |
| Property Grid | xmlns:mxpg="https://schemas.eremexcontrols.net/avalonia/propertygrid" |
| Ribbon | xmlns:mxr="https://schemas.eremexcontrols.net/avalonia/ribbon" |
| Toolbars and Menus | xmlns:mxb="https://schemas.eremexcontrols.net/avalonia/bars" |
| Docking | xmlns:mxd="https://schemas.eremexcontrols.net/avalonia/docking" |
| Graphics3DControl | xmlns:mx3d="https://schemas.eremexcontrols.net/avalonia/controls3d" |
| Common Helper Classes | xmlns:mx="https://schemas.eremexcontrols.net/avalonia" |
8. Add a Data Grid in XAML
In the MainWindow.axaml file, define a DataGridControl and bind it to the Employees collection.
<mx:MxWindow xmlns="https://github.com/avaloniaui"
        xmlns:x="http://schemas.microsoft.com/winfx/2006/xaml"
        xmlns:vm="using:AvaloniaApplication1.ViewModels"
        xmlns:d="http://schemas.microsoft.com/expression/blend/2008"
        xmlns:mc="http://schemas.openxmlformats.org/markup-compatibility/2006"
        xmlns:mx="https://schemas.eremexcontrols.net/avalonia"
        xmlns:mxdg="https://schemas.eremexcontrols.net/avalonia/datagrid"
        mc:Ignorable="d" d:DesignWidth="800" d:DesignHeight="450"
        x:Class="AvaloniaApplication1.Views.MainWindow"
        x:DataType="vm:MainWindowViewModel"
        Icon="/Assets/EMXControls.ico"
        Title="AvaloniaApplication1">

    <Design.DataContext>
        <!-- This only sets the DataContext for the previewer in an IDE,
             to set the actual DataContext for runtime,
             set the DataContext property in code (look at App.axaml.cs) -->
        <vm:MainWindowViewModel/>
    </Design.DataContext>

    <mxdg:DataGridControl AutoGenerateColumns="True" ItemsSource="{Binding Employees}"
     SearchPanelDisplayMode="Always"/>

</mx:MxWindow>
The DataGridControl.AutoGenerateColumns option is enabled to automatically generate columns from public properties of the bound item source.
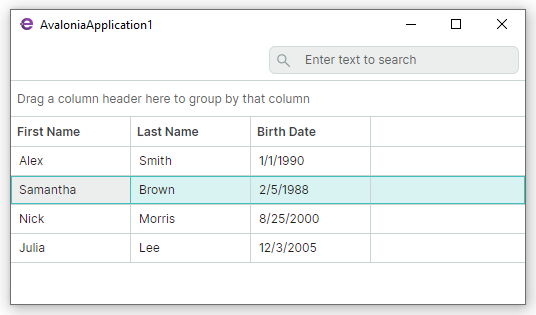
The DataGridControl.SearchPanelDisplayMode property specifies the visibility of the search box, which allows a user to quickly locate grid rows by values they contain.
9. Run the Application
Now you can run the application (press F5). A window with a fully functional Data Grid control appears when the application is launched. The grid allows you to sort and group data out of the box. To locate cell values, type text in the search panel.